%20(1).png)


%20(1).png)
.jpg)


.jpg)
.jpg)


.jpg)


.png)


.png)


.png)


.png)

.png)
.png)

.png)
.png)

.png)

.png)


.png)
.png)
%20(1).png)
.png)


.png)


.png)
.png)

%20(1).png)

%20(1).png)


.png)


.png)


.jpeg)


.png)


.png)


.png)

.png)

.png)
.jpeg)


.png)


.png)

.png)


.png)


.png)


.png)


.png)

.png)

.png)
.png)

.png)
.png)

.png)

.png)

.png)


.png)


To create hyper-personalized email campaigns and automations, you need to understand your audience on a deeper level.
But with hundreds of thousands of contacts scattered all over the place, it’s hard to keep track of each contact’s individual needs and behavior.
This is why managing your contacts effectively is key to ensuring your email marketing campaigns are a success!
Of course, having the right email marketing tool at your disposal helps.
At Sendlane, we’ve revamped our Audience tab to make it as easy as possible for you to keep your contacts and lists organized!
In this post, we’ll show you six awesome ways you can manage your contacts in Sendlane and maximize the results you get out of your email campaigns.
Ready? Let’s get started!
6 Best ways to manage contact in Sendlane
1. Using tags & segments to create hyper-targeted messages
One of the best ways to manage your contacts is to chop them up into targeted segments. Think of it as a big pie cut up into slices!
Segmenting your contacts can help you send personalized messages to your contacts and even create hyper-targeted lists. The more personalized your messages are, the better results you’ll see out of your email campaigns!
You can create segments based on various factors, such as age, location, website activity, engagement levels, past purchases, and more.
How to create a segment in Sendlane
- Head to Audience and click on the Segments tab.
- Click on + Segment to create a new segment, and type in a name.
- Configure your segment using the options and operators provided.
- Hit Save, and you’re done!
Note: You can add more conditions to your segment depending on your needs. Add an “AND” condition if you want the contact to meet all of the conditions to be added to the segment. Add an “OR” condition if you want the contact to meet any of the conditions to be added to the segment.
For example, if you wanted to create a segment for your Active Subscribers, you could set the following conditions:
- Contact opened any campaign OR
- Contact clicked on any campaign
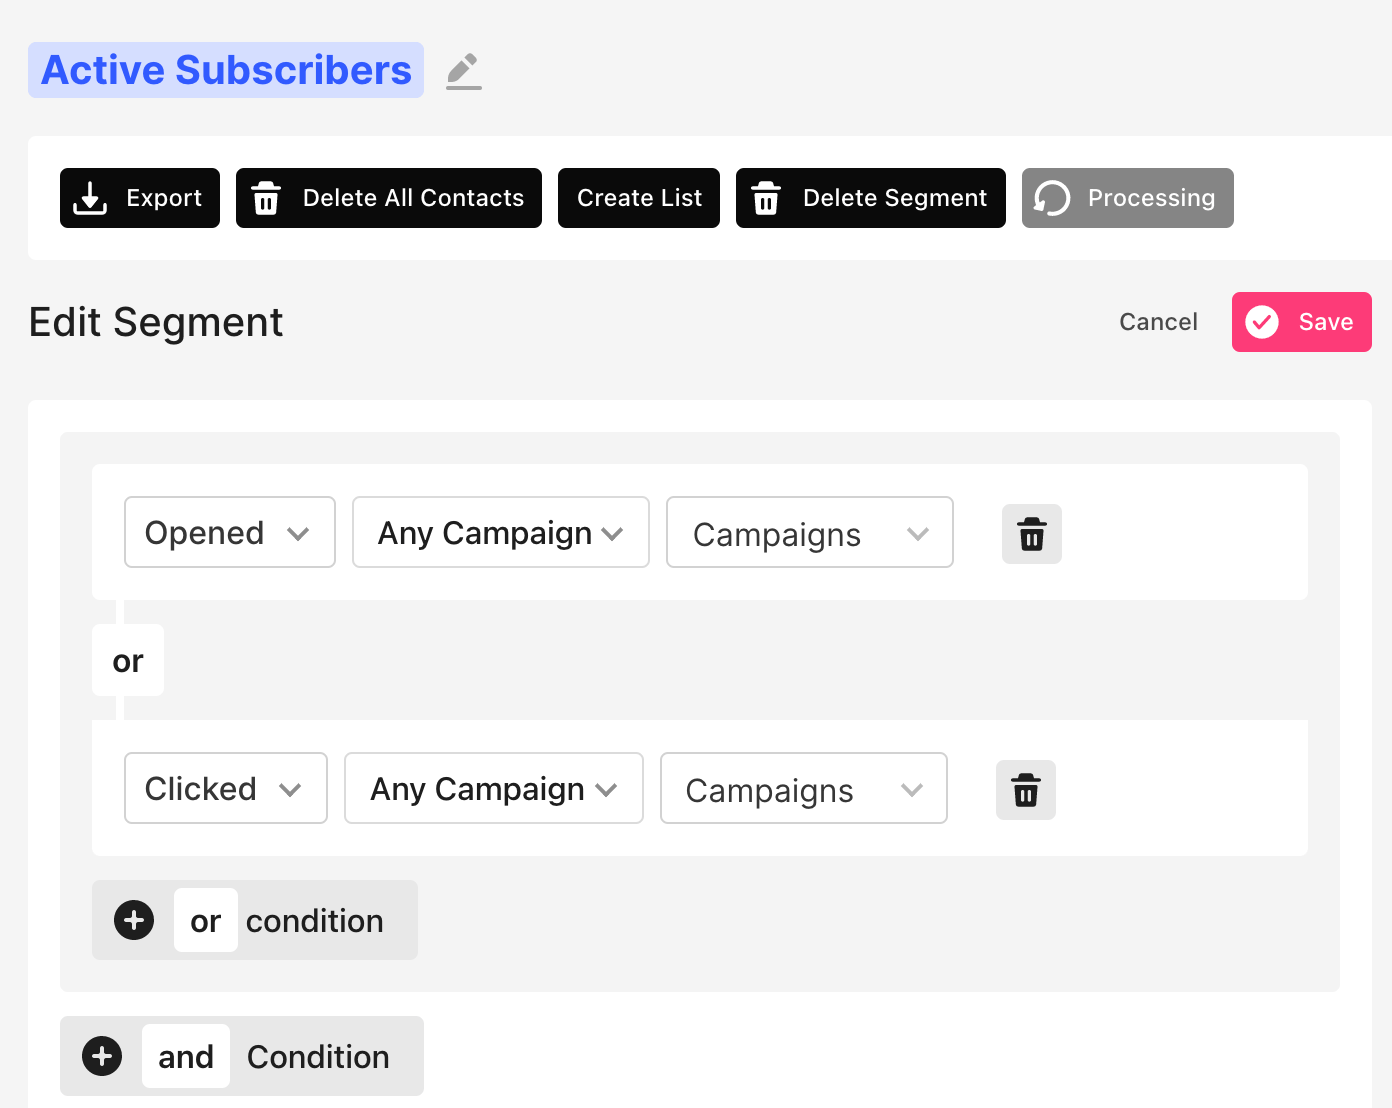
This means any contact that opens or clicks on any of your campaigns will be automatically added to the Active Subscribers segment.
Learn more about using segments in Sendlane.
One way to create segments in Sendlane and target specific groups of contacts is to add tags to your contacts’ profiles.
Tags are labels you can assign to each individual contact to identify and filter them. You can add tags to contacts through an automation funnel or manually. You can also add tags via pop-ups, during import or through a link or image in an email!
For example, let’s say you run an online jewelry store. You might have identified some contacts who bought a necklace from your store in the past, and you want to share your upcoming necklace collection with them.
You can tag these contacts with “Necklace” and send them a personalized email campaign announcing the launch of your new necklace collection.
Want to take this a step further? Add multiple tags to create hyper-targeted segments!
For example, your new necklace collection might be expensive, and you might want to send the email to only those contacts who’ve purchased expensive items from your store before.
You can tag these contacts with “Necklace” and “Spent $100+” and create an even targeted segment. This will ensure that the right contacts receive your email, leading to higher open and engagement rates!
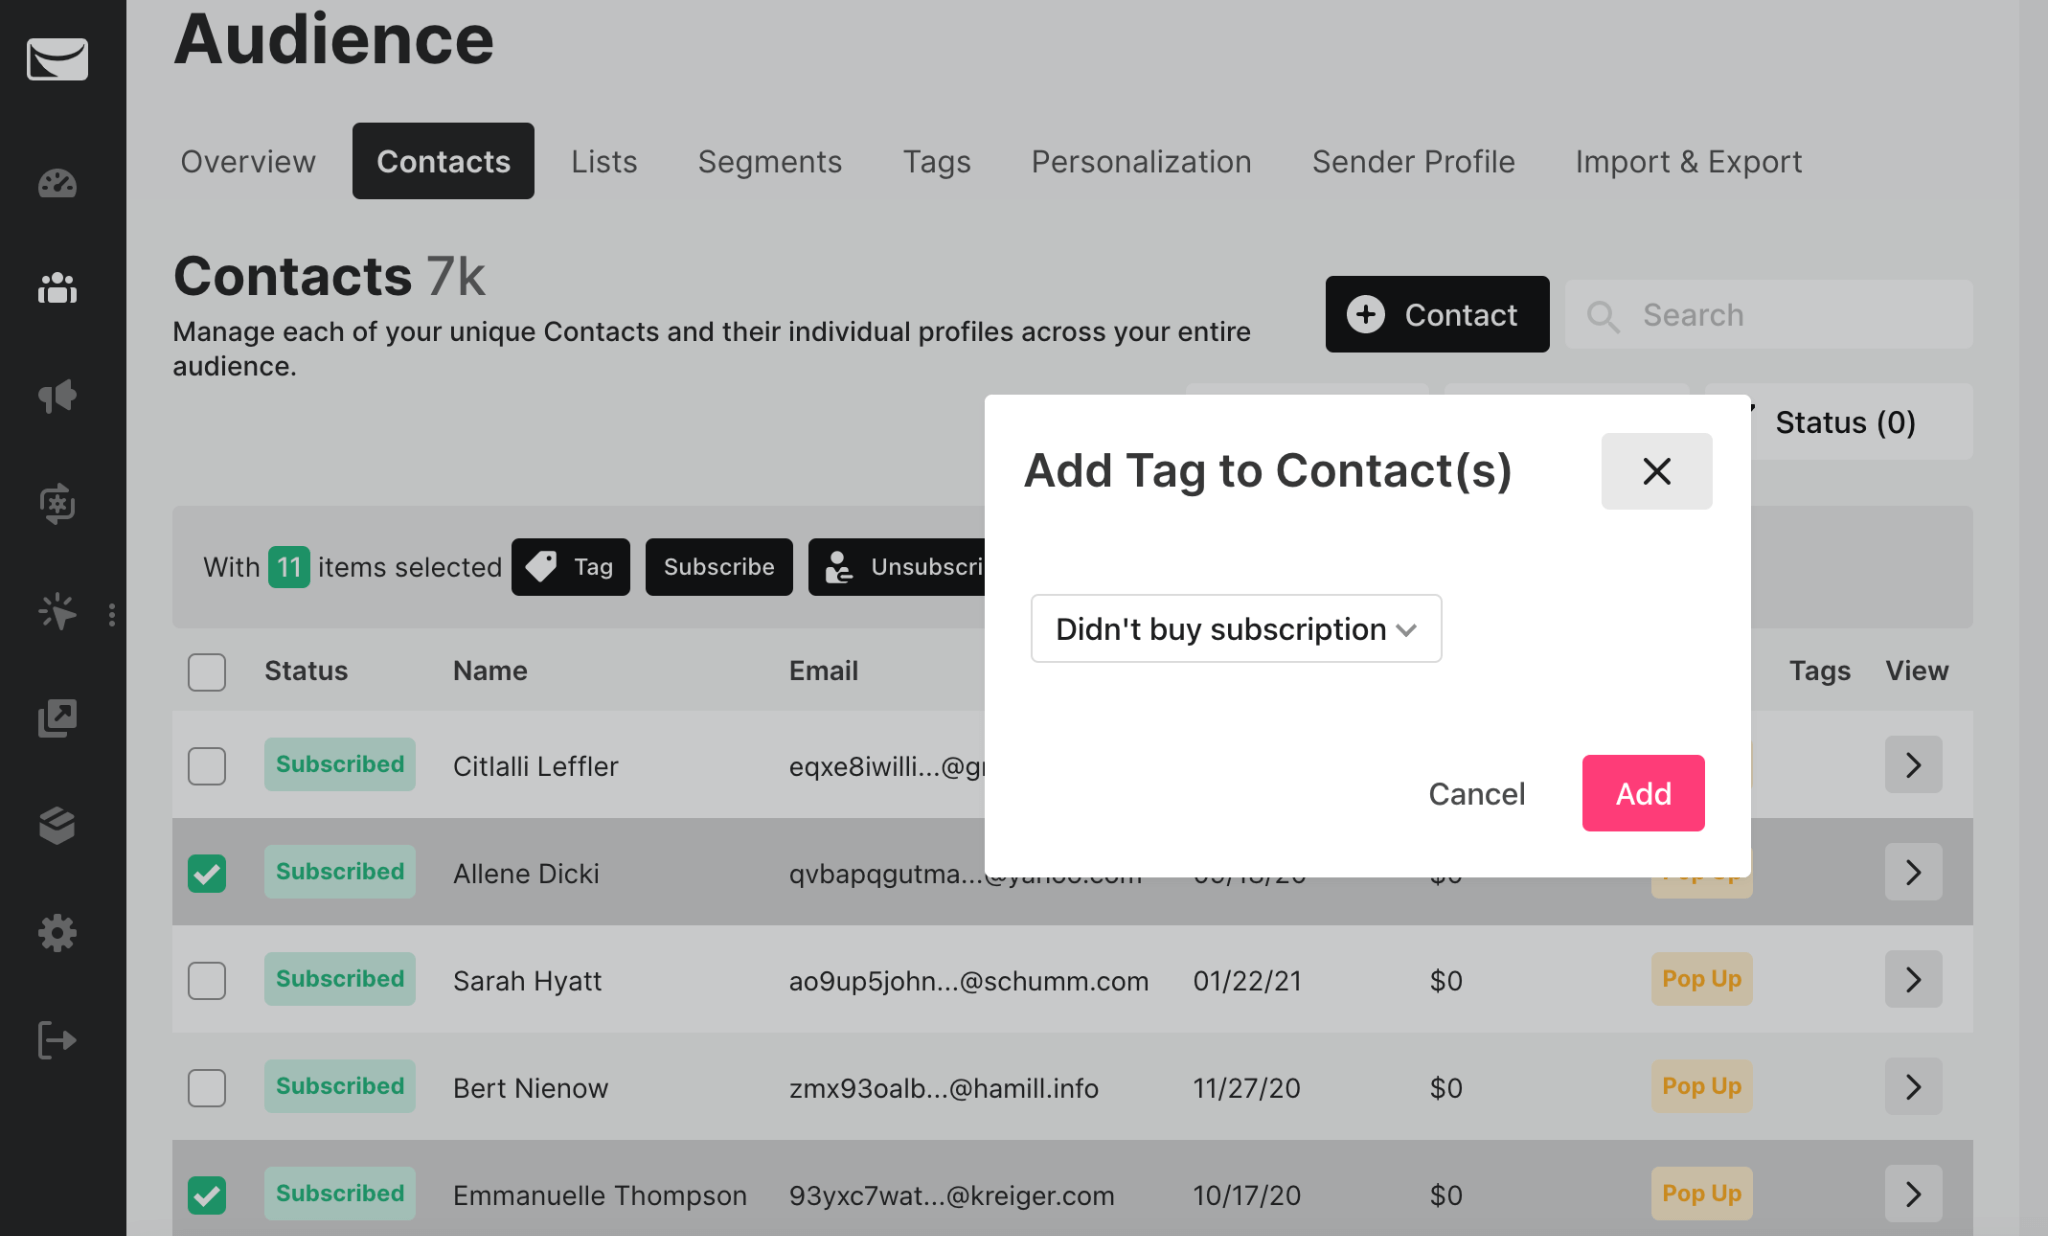
How to add tags to your contacts in Sendlane
To tag your contacts inside Sendlane, the first thing you need to do is create a tag.
- Open Audience from your dashboard, and click on Tags at the top.
- Click on + Tag and assign a name to your Tag.
- Open the Contacts tab, and select the contacts you wish to tag.
- From the menu that appears at the top, click on Tag.

- Choose the Tag you want to add to the selected contacts from the drop-down menu.
2. Keep contacts organized into lists
Just like segments, lists are a great way to keep your contacts organized.
You can add contacts with different characteristics or tags to a list based on one or more factors.
For example, you might want to create a list of 18-24 years old contacts and have bought something from your store at least once.
You can name this list “Young Adult Customers” and send them targeted emails about specific products they’re likely to be interested in.
In Sendlane, you can easily subscribe or unsubscribe contacts to lists, and even merge two or more lists to create a new, separate list!
You can also create a list from a segment and then send that List through an automation or export it to Facebook to create a Custom Audience.
How to create a list from a segment in Sendlane
Here’s how you can create a list from a contact segment in Sendlane:
- Head over to Audience → Segments.
- Choose the segment you want to create a list from and click on Create List.
- Name your List and click on Create.
- You can find and edit this new List under the Lists tab.
Learn more about creating a List in Sendlane.
Creating lists from highly targeted segments helps you quickly organize very specific contacts into static email lists.
You can also create a list manually and add contacts by importing in bulk or adding contacts one by one.
//[inject:ad-demo]
3. Contact re-engagement & list hygiene to remove outdated and inactive contacts
You may have the longest email list in the world, but if it’s full of outdated or inactive contacts, your List might be doing more harm than good for your business.
Here are two reasons why:
- Outdated and inactive contacts on a list can drive down your engagement metrics.
- Most email service providers charge by the number of contacts you message.
This is where list hygiene comes in.
Cleaning your lists regularly helps you send emails to people who want to hear from your brand. The result? More opens, clicks, and conversions!
It also helps you save costs by ensuring you’re not sending all those extra emails to outdated and inactive contacts.
You can also attempt to re-engage inactive contacts by sending them tailored emails designed to pique their interest.
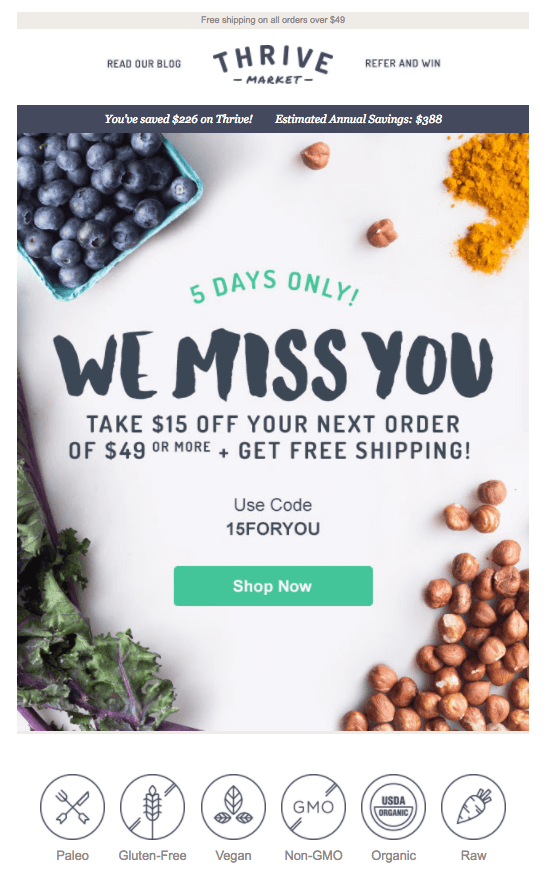
For example, you can send a time-sensitive discount to contacts who haven’t clicked on any of your emails in the last 30 days. Here’s how Thrive Market does it:
If contacts respond to your re-engagement emails, you can keep them on your List. But if they fail to do so, we recommend you take them off your List to avoid wasting any more resources!
How to clean your email lists in Sendlane
To help you clean your lists, Sendlane offers the List Hygiene feature.
To enable list hygiene, navigate over to the Lists tab in the Audience section, and choose the List you want to run list hygiene for.
Click on Hygiene in the top-right corner of your screen. Here, you’ll be able to choose between two options; smart list hygiene and automatic list hygiene.
- Smart list hygiene: This one-time list hygiene option lets you manually configure the number of days contacts need to be inactive and remove all the contacts on the List who meet the criteria.
- Automatic list hygiene: This option automatically removes unengaged contacts who meet the criteria at regular intervals. Just like smart list hygiene, you’re able to choose the number of days a contact needs to be inactive to be removed.
Learn more about running list hygiene in Sendlane.
Pro-tip: We recommend running list hygiene every 14 days and removing contacts that have been inactive for 60 days.
Also, you can always restore removed contacts from the History tab in case you feel like you’ve made a mistake.
4. Import contacts from different sources to keep them all in one place
It’s not uncommon to see marketers juggling several spreadsheets with contacts details obtained from different sources.
Your business may have multiple customer touchpoints. And you may end up collecting email addresses at each touchpoint.
But is that the best way to keep contacts organized? Nope, not at all.
Not only is it a hassle to hop from your order management software to a Google sheet to the sign-up paper you used at that event two weeks ago, but it’s also risky business.
You may end up confusing contacts, sending emails to the wrong List, or worse, failing to reach some potential customers just because you couldn’t find their email addresses.
The solution? Keep all your contacts in one place.
In Sendlane, you can import contacts from different sources, such as from another software or a Google or Excel sheet. You can also manually add contacts, which is a useful feature if you have some email addresses jotted down on pieces of paper.
This helps you better organize and manage your contacts so you can send them targeted email campaigns without having to go back and forth between lists.
Pro-tip: Did you know that Sendlane lets you tag contacts when you import them? For example, if you’re importing contacts from a fashion event spreadsheet, you can automatically tag all of these contacts with “Fashion Show” upon import.
How to import contacts into Sendlane
Here’s a quick step-by-step to help you import contacts into your Sendlane account:
- Navigate over to Audience → Lists and select the List that you want to add contacts to. Or, create a new list by clicking on + List, and then select that List.
- From the list options, click on Import. Here, you’ll be able to choose between two options; adding contacts manually or uploading a .CSV or .TXT file.
- Now, it’s time to configure your fields to make sure everything looks good and organized. You can also create custom fields or apply tags to all the contacts in your file.
- Finally, click on Import Contacts to finish the process, and you’re done!
Learn more about importing and exporting contacts in Sendlane.
5. Use custom fields to gather more information about contacts
Collecting names and email addresses is great, but why stop there?
You can grab tons of other valuable information on your contacts — custom fields help make that happen!
The more data you have on your contacts, the more targeted you can get with your segments, automations, and email campaigns.
In Sendlane, you can add custom fields to your pop-ups and sign-up forms to collect information like location, birthday, and even your contact’s favorite color.
Imagine what you can do with all of this data!
You can send subscribers an exclusive discount coupon on their birthday or announce special events in the region based on your contact’s location. You can even show contacts products in their favorite color to boost your chances of making a sale!
Custom fields allow you to get granular with your email marketing by personalizing content uniquely and creatively.
The more information you have on your subscribers, the more ammo you have to work with!
How to add custom fields to your pop-ups in Sendlane
Here’s how to add custom fields to your pop-ups and sign-up forms in Sendlane:
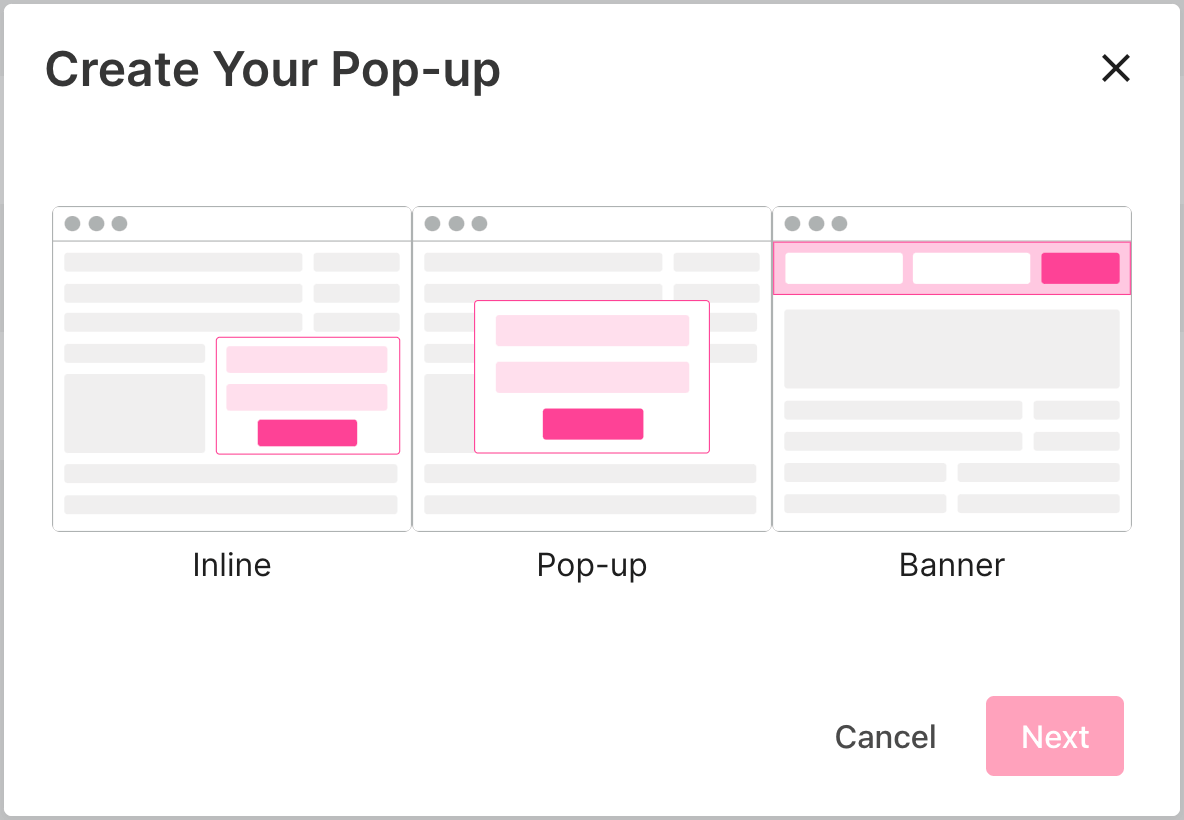
- Head to the Pop-Ups section and click on New Pop-Up in the top-right corner. You can also edit an existing pop-up from the List.
- Choose from one of the three pop-up styles; in-line, pop-up, and banner.
- Name your form and click on Create Pop-Up to open the form editor.
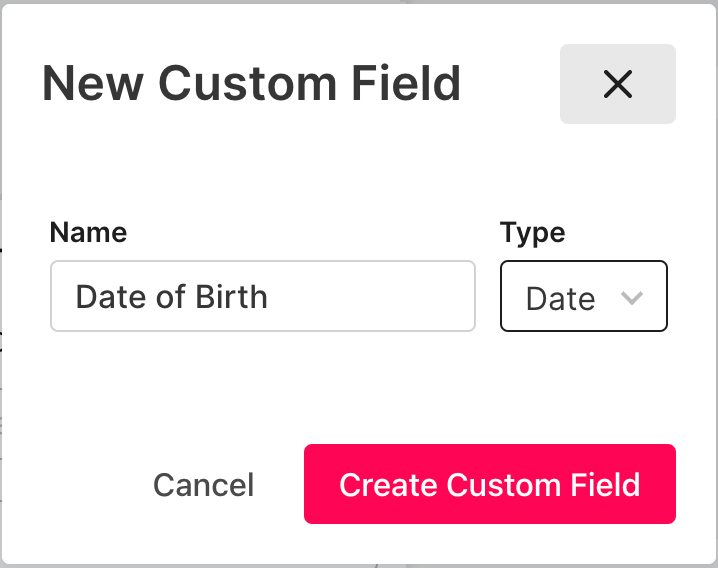
- From the menu on the right, scroll down and click on Add Custom Field.
- Add a name for your custom field and select the type (e.g., date or text.)
- Drag and drop this new custom field onto your form.
Learn more about creating and using custom fields in Sendlane.
That’s it — you’re done!
Now, when you publish your form to your website, your subscribers will be able to fill in this custom field with the required information.
//[inject:ad-ebook-holiday-marketing]
Make contact management a breeze with Sendlane
Maintaining a healthy list and keeping your contacts organized are key to any successful email marketing strategy.
If your contacts are all over the place, your email targeting will follow suit!
With Sendlane, it’s easy to manage your contacts, organize your lists and store up-to-date subscriber data.
Want to see for yourself? Sign up for Sendlane’s free 60-day trial and take it for a spin!