


%20(1).avif)


%20(1).avif)
%20(1).png)
.avif)


.avif)
.avif)


.avif)


.avif)


.avif)


.avif)


.avif)

.avif)
.avif)

.avif)
.avif)

.avif)

.avif)


.avif)
.avif)
%20(1).avif)
.avif)


.avif)


.avif)
.avif)

%20(1).avif)

%20(1).avif)


.avif)


.avif)


.avif)


.avif)


.avif)


.avif)

.avif)

.avif)
.avif)


.avif)


.avif)

.avif)


.avif)


.avif)


.avif)


.avif)

.avif)

.avif)
.avif)

.avif)
.avif)

.avif)

.avif)

.avif)


As your business grows, so will your email list.
Over time, it can get increasingly difficult to segment your contacts, especially when they’re interacting with your brand in so many different ways.
With tags, however, you can easily split up your lists into highly targeted segments.
This ultimately helps you send more relevant emails and increase engagement!
In this post, we’ll show you what tags are, why they matter and how you can use them to send targeted emails to your contacts.
Let's get started!
What are tags and why are they important?
Tags are labels that you can assign to your contacts based on their unique interests, activity and behavior.
This helps you to track their customer journey, create highly targeted segments and send personalized emails that actually convert.
While you can still segment your contacts by creating multiple lists, tags can help you dive deeper and get really granular!
For example, let’s say you’ve created a list of repeat purchasers. With tags, you can further segment this list by:
- Customers who made a repeat purchase in the last 3 months
- Customers who made multiple repeat purchases in the last 3 months
- Customers who made a repeat purchase in only one product category
The point is, while lists can limit you to only one type of contact characteristic, tags let you send personalized emails based on a combination of various characteristics.
How to get started with tags in Sendlane
Using tags in Sendlane is easy, but before you start assigning them to your contacts, you need to add them in the system.
Adding or deleting a tag
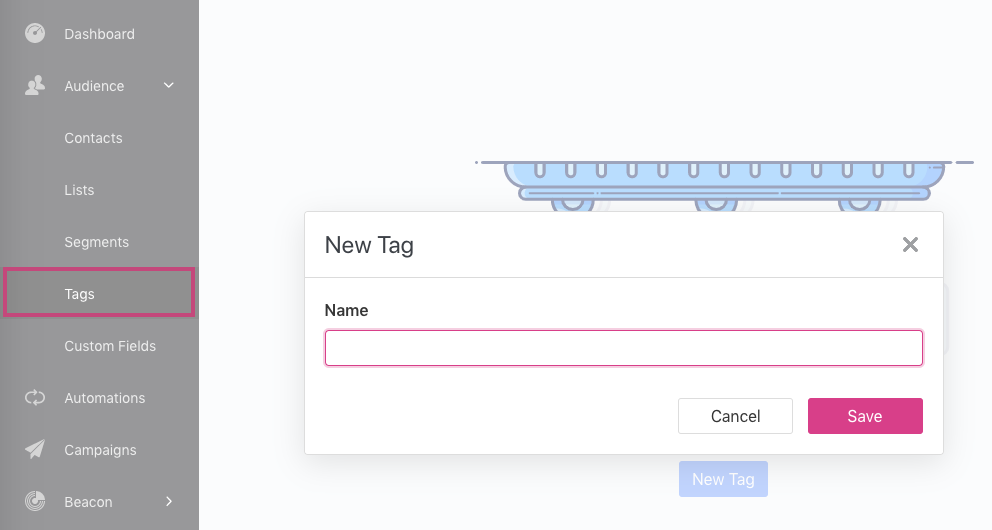
To create a new tag, navigate over to your left sidebar and click on Audience → Tags.
Click on the New Tag button, name your tag and click on Save.
You can view all your created tags in the dashboard. To delete any tag, click on the three dots next to Edit and select Delete from the dropdown.
Ready to start assigning tags to your contacts?
In Sendlane, there are multiple ways you can do that.
To better understand the following sections, let’s consider a fictional example of Blossoms, an online store that sells indoor and outdoor plants.
Here’s how Blossoms can assign tags to its contacts in Sendlane.
Tagging imported contacts
If you have an existing list of contacts, you can easily import it into your Sendlane account and add tags to them.
Going back to our example, let’s say that Blossoms has a separate Excel file with a list of contacts who previously purchased an indoor plant. They want to import these contacts into Sendlane, and add the tag “indoor plants” to all of these particular contacts.
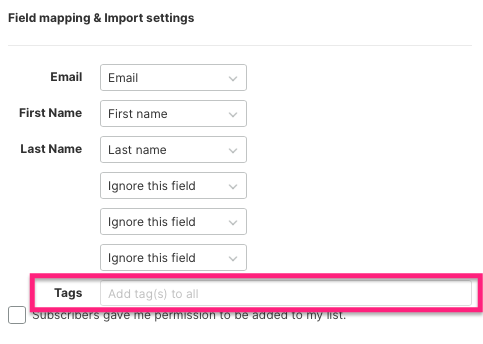
First, Blossoms would need to upload a .CSV or .TXT file. After that, they can begin mapping the fields. This is where they can add the tag to their contacts.
In Sendlane, tags applied to imported lists will add the tag to every single contact in the file. If you want to add different tags, you’ll have to create a separate file for each group.
Tagging a manually added contact
If you’re adding contacts manually into your Sendlane account, you also have the option to add tags during the process.
Let’s say that Blossoms decides to manually add and tag contacts who previously purchased an indoor plant to Sendlane.
First, they would navigate over to the Audience → Lists on the left sidebar and pick the list they want to add their contact to.
In the Quick Add fields, they now have the option to add a tag, where they will pick “Indoor Plants”.
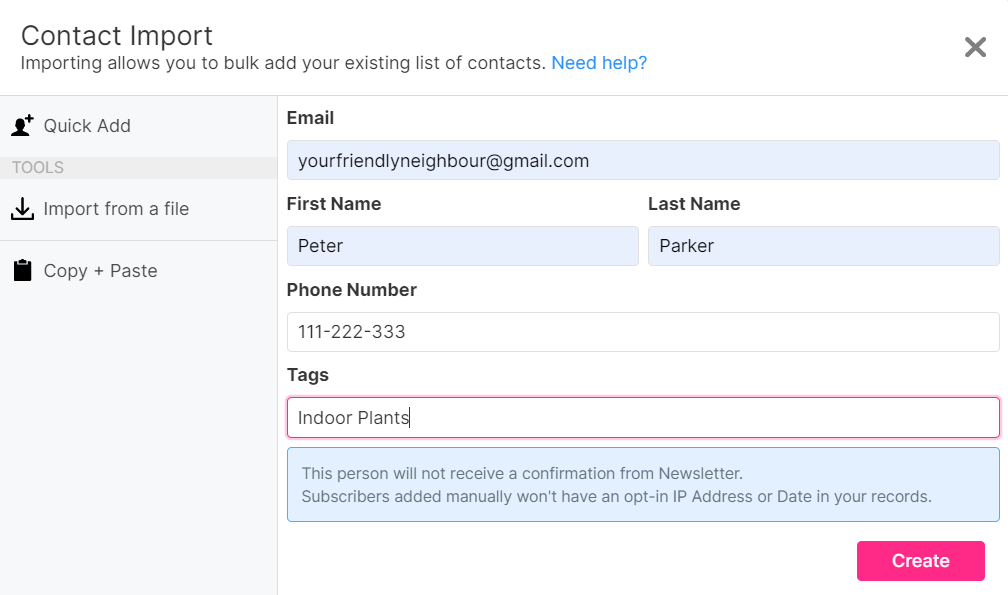
Clicking on Create will add the contact, along with the tag, to their desired email list in Sendlane.
//[inject:ad-demo]
Tagging a link
Another way to tag your contacts in Sendlane is through a link inside your email.
When a contact clicks on that specific link, a tag will be added to their profile, making it easier for you to identify and target them with your future email campaigns.
To do that, you would need to click on Campaigns on the left sidebar. You can either edit an existing campaign here or create a new one.
In the Design Email area, you have the option to hyperlink any text and add a URL and optional tag to it.
Let’s say that Blossoms sends out an email to its contacts that includes a call-to-action linking back to its website. They want to tag contacts who click on the link so they can send targeted emails to these visitors in the future.
Here’s how Blossoms would do it.
- Step 1: Add a website link to the “New Arrivals” CTA in the email.
- Step 2: Add the tag name next to the URL (e.g. “Clicked”.
When contacts click on the CTA and are taken to Blossoms’ website, the specified tag will automatically get added to their profile.
Tagging an image or button
In Sendlane, you can also add tags to clickable images and buttons.
The way this works is similar to adding a link and tag to selected text inside an email.
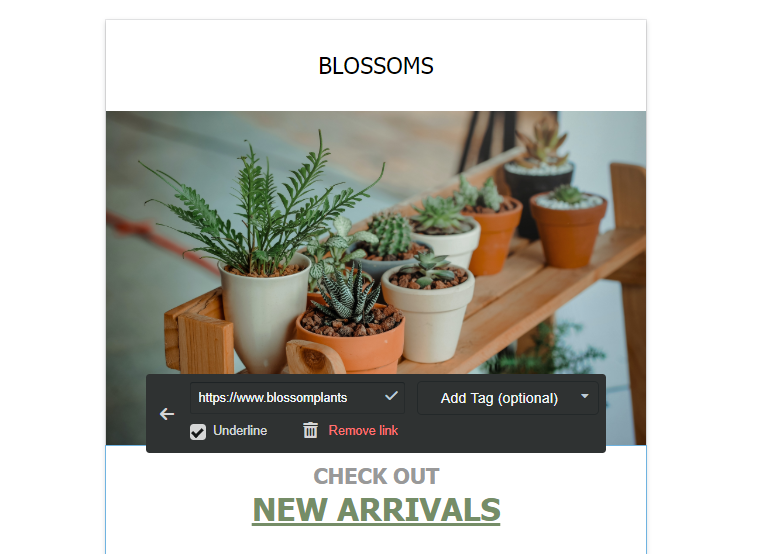
First, you need to select the image you want to hyperlink and tag. Then, you can enter the information on the left side.
Let’s say that, along with the “New Arrivals” CTA, Blossoms also wants to link the image inside the email to their website, and tag contacts who click on that image.
Here’s how they would do it.

When a contact clicks on the image inside the email, they’ll be taken to Blossoms’ website and the specified tag will be automatically added to their profile!
Tagging contacts in your automation funnel
Sendlane also lets you add tags to contacts when they are added to or reach a certain step in an automation funnel.
In our example, let’s say Blossoms is taking pre-orders for an exotic plant. Customers who submit the pre-order form will enter an automation funnel that keeps them updated with the stock and delivery status.
Blossoms wants to add a “Pre-order” tag to these contacts to identify them in the future and send them targeted emails about other exotic plants they might be interested in.
Here are the steps Blossoms would follow to tag these contacts in Sendlane.
- Step 1: In the automation funnel, add a trigger and select Subscribes to a list.
- Step 2: Select the Pre-order list.
- Step 3: Click on the + sign and select Update Contact Property → Add Tag.
- Step 4: Select the “Pre-order” tag.
This is what their automation funnel should look like.

//[inject:ad-ebook-segmentation]
Use tags to create highly targeted segments and emails
Creating multiple email lists sounds like a great idea, until you realize that your contacts are all different and need to be targeted based on their own unique interests and actions.
This is where tags can help you out.
Instead of trying to fit contacts into specified lists, you can simply add tags to them and send out personalized emails based on these tags depending on your need.
With Sendlane, you can use tags to understand your contacts better, connect with them on a more personal level and ramp up your engagement rates.
Start creating highly targeted segments and emails now by grabbing a free 60-day test drive of Sendlane right here.


