


%20(1).avif)


%20(1).avif)
%20(1).png)
.avif)


.avif)
.avif)


.avif)


.avif)


.avif)


.avif)


.avif)

.avif)
.avif)

.avif)
.avif)

.avif)

.avif)


.avif)
.avif)
%20(1).avif)
.avif)


.avif)


.avif)
.avif)

%20(1).avif)

%20(1).avif)


.avif)


.avif)


.avif)


.avif)


.avif)


.avif)

.avif)

.avif)
.avif)


.avif)


.avif)

.avif)


.avif)


.avif)


.avif)


.avif)

.avif)

.avif)
.avif)

.avif)
.avif)

.avif)

.avif)

.avif)


Personalization is key to making your emails more noticeable and engaging.
But if you’re still just using subscriber names to personalize your emails, you’re doing the same thing as thousands of other brands out there.
Take things even further by creating hyper-personalized emails based on unique subscriber data that other brands aren’t asking for.
This is exactly what Sendlane’s custom fields allow you to do.
With custom fields, you can collect in-depth and useful information about your subscriber and create highly targeted campaigns that your contacts will love to engage with!
In this post, we’ll help you learn about custom fields and how to get started with them in Sendlane.
Let’s dive right in!
What are Custom Fields?
Custom fields are the extra fields you add in your forms to gather more information about your contacts during sign up.
Collecting more than just basic data, such as names and email addresses, helps you better segment contacts and send highly targeted emails that drive engagement!
To explain this better, let’s consider an example of HomeLife, an online store that sells home goods.
HomeLife could add a custom field to their opt-in form that asks subscribers, “What color is your home decor?” in addition to their name and email address.
This would help them gather insight into the aesthetic their customers are shopping for.
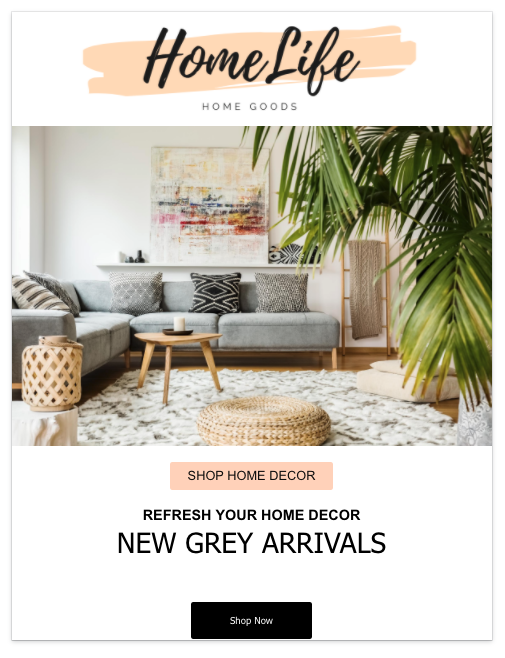
HomeLife could then use this information to send personalized emails!
For example, they could send emails about grey accent furniture for those with grey home decor.
The more relevant your content is, the more likely subscribers will be to engage with your emails and click on the links inside!
How to Use Custom Fields to Create Tailored Emails in Sendlane
In Sendlane, you can do two things:
- Add custom fields into your popups and forms
- Use the information collected to send personalized emails
In this section, we’ll show you how to do both in three simple steps!
To make this easier to understand, let’s go back to our example of HomeLife and how they would add and use a custom field in Sendlane.
Step 1: Create a custom field
To create a new custom field inside Sendlane, navigate over to the left sidebar and click on Audience → Custom Fields.
Next, click on New Custom Field on the top-right of your screen.
You’ll be able to enter a name for your field and choose the type of data you’d like subscribers to submit.
Here’s how HomeLife will set up their custom field in Sendlane.

Sendlane offers various data types to choose from, so pick one that makes the most sense with your field.
Here are some of the field types currently available in Sendlane.
- Text
- Date
For HomeLife, the text option makes the most sense as there are thousands of colors for subscribers to enter.
//[inject:ad-demo]
Step 2: Add the custom field to your pop-up
Once you’ve set up your custom field, the next step is to add it inside a pop-up.
A pop-up is an opt-in form that appears on your website so your visitors can subscribe and leave their details with you!
To create your pop-up, click on Pop-Ups from the left sidebar, and select New Pop-up from the top-right corner of your screen.
Here, you’ll need to choose the type of pop-up you want to create.
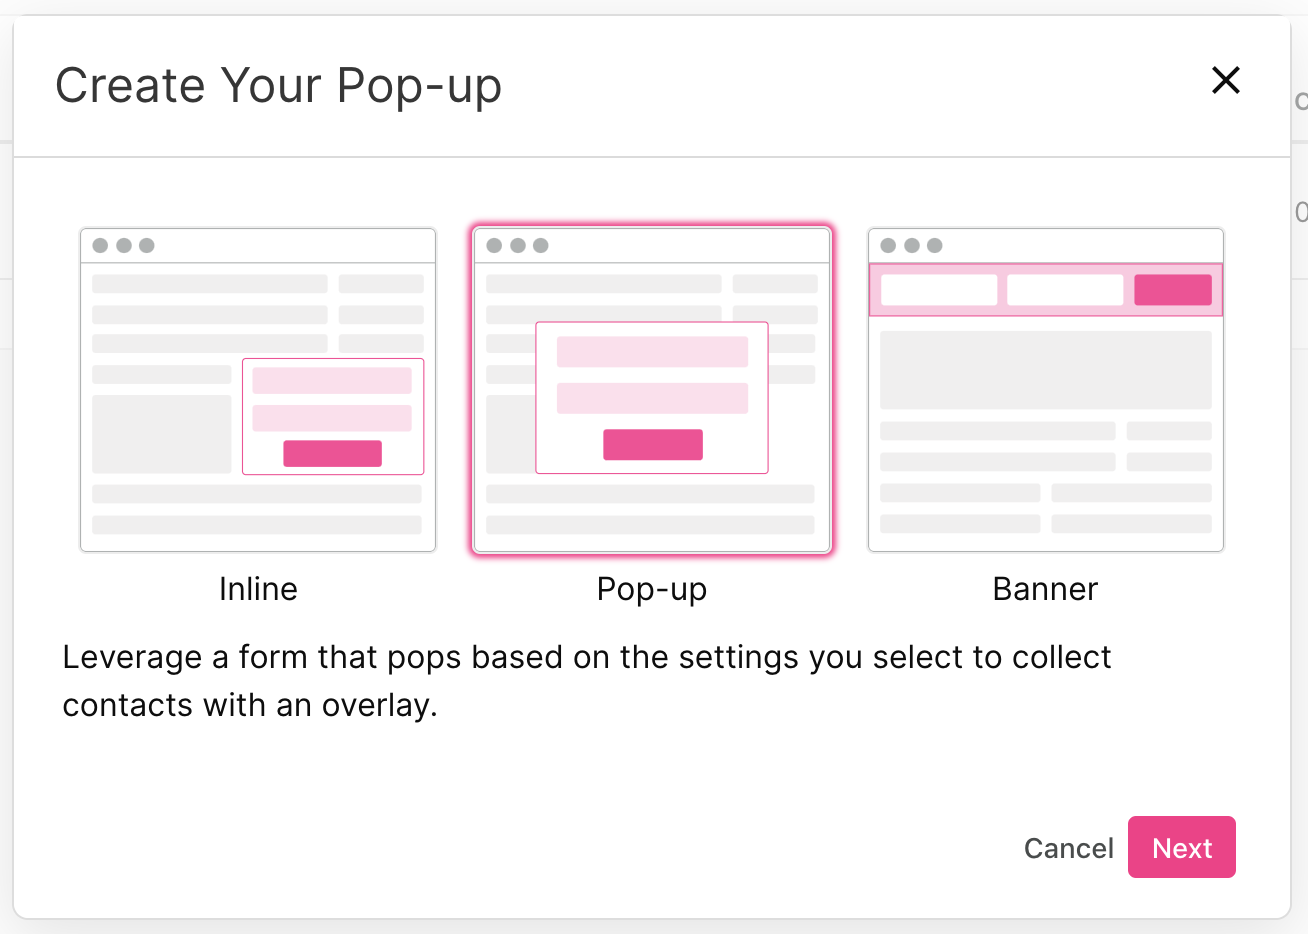
Sendlane offers three different kinds of pop-up forms.
- Inline: Inline pop-ups are added to a particular area of your web page, depending on where you place the code.
- Pop-up: These forms pop up when a visitor has browsed your web page for a specified amount of time.
- Banner: These forms appear as banners on the top or bottom of a web page, and move with the visitor as they scroll through the page.
Choose the type of pop-up you want to create and click on Next. Here, you’ll need to assign a name to your form and click on Create Pop-up when complete.
Now it’s time to add your custom field to the pop-up!
From the menu on your right, select the custom field you want to add and drag it onto your form.
Here’s how HomeLife’s form could look like after they add the field.
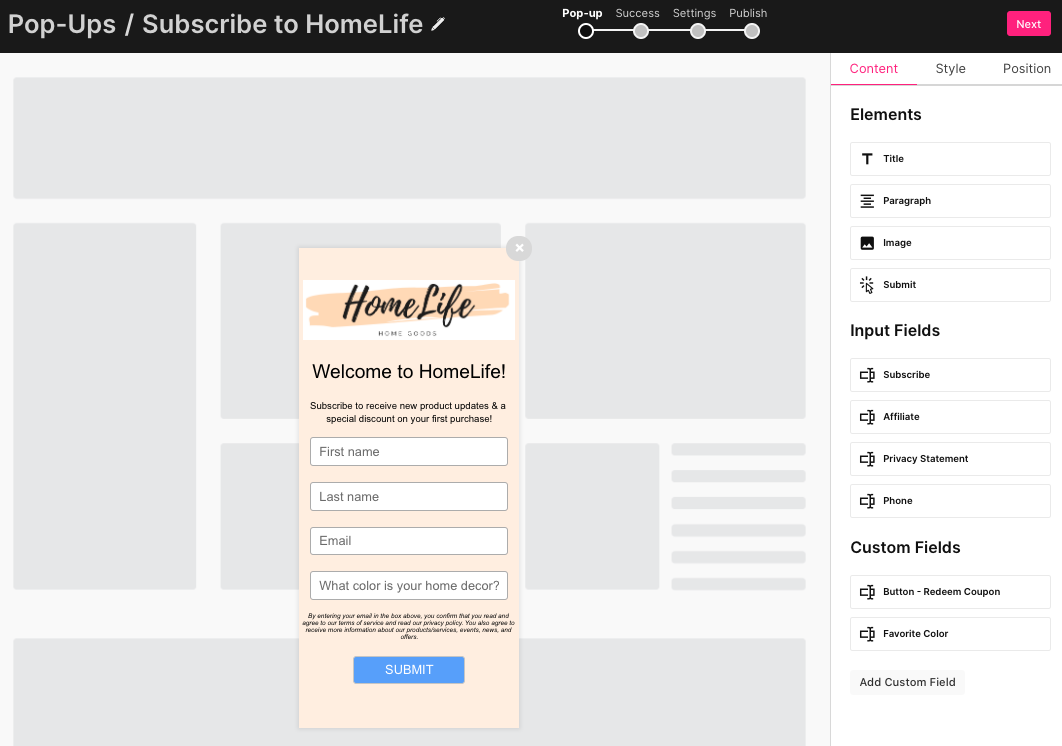
Then, click on Next at the top of the screen.
Decide what happens when contacts subscribe to your list, design a Thank You message, and finally install the pop-up code on your site to start collecting subscriber information!
Step 3: Use the data to create hyper-personalized emails
When people start subscribing to your list, you’ll have access to all the information they filled out on the forms.
Use this data to segment your contacts and create hyper-personalized emails!
To create an email that makes use of a custom field, click on the Campaigns tab from the left sidebar and create a new campaign.
Name your campaign and click on Next to start editing the subject line, preheader, and design your email.
To add the custom field information unique to each contact in the subject line or preheader, click on the tag icon next to the field!
You can also add the custom field information into the content of your email.
To do so, click on Edit Email to launch the email builder.
Add the custom field information by clicking on the tag icon that appears on the toolbar when you’re editing a text box.
Then, select the custom field tag you want to add from the drop-down menu!
Here’s how HomeLife would add their custom field tag into the content of their email.
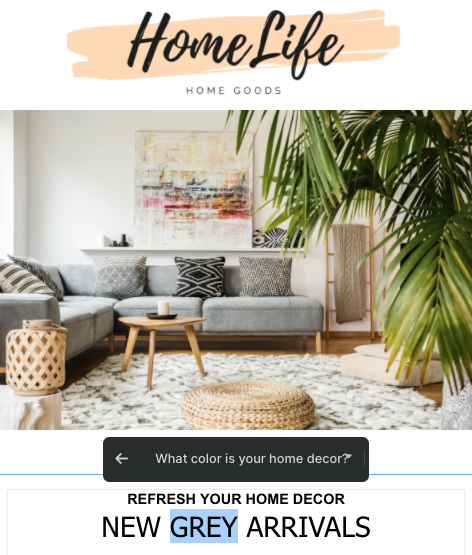
This will add the unique VAR code assigned to the custom tag into the text box, which could look like this.
When you send out the email, each subscriber will see the color they entered into the custom field during sign up!
Take Personalization to The Next Level With Custom Fields
Ready to create unique emails that subscribers want to open and engage with?
Use custom fields to collect insightful data that guides your email content and design.
Not only will that help you create highly personalized emails and segment your lists, but you’ll also be able to better understand your target audience!
Sign up for a free 60-day trial of Sendlane and take it for a test drive!


